UPTIME_APP_API_BASE_URL=http://143.110.231.94:52345/api/v1
UPTIME_APP_CLIENT_HOST=http://143.110.231.94
CLIENT_HOST=http://143.110.231.94
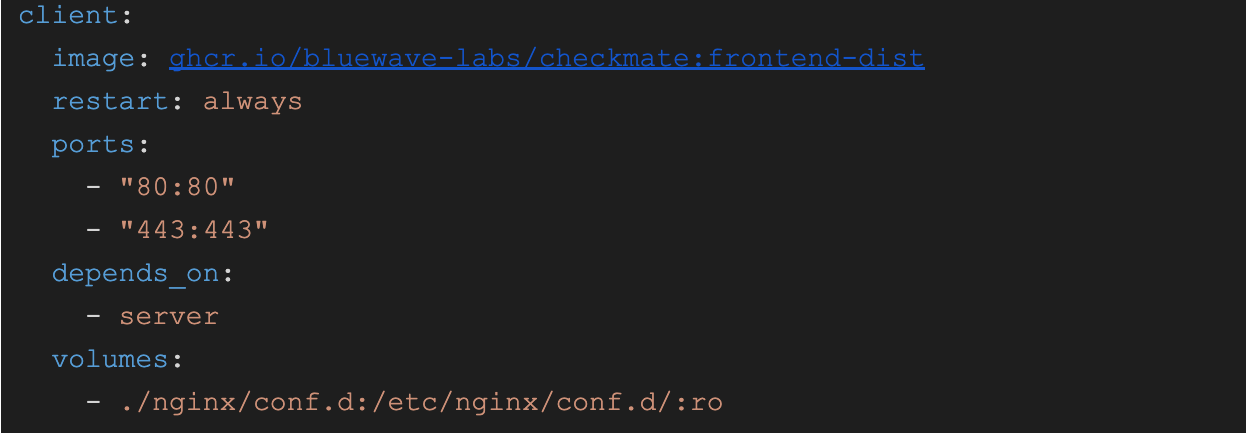
* As long as you mount the same directories to the MongoDB image you'll retain your data. * The Mongo part of the application remains unchanged. * You can always back up your data directory as well before migration. ## Option 2: Separate FE/BE Docker installation In this installation, the React front-end is served by an Nginx Docker image (named Client) and is independent of the API server. Note that if you want to configure Nginx, you will have to mount a volume to the Client image to override the default config:
| ENV Variable Name | Required/Optional | Type | Description | Accepted Values |
|---|---|---|---|---|
| CLIENT_HOST | Required | string | Frontend host | |
| JWT_SECRET | Required | string | JWT secret | |
| DB_CONNECTION_STRING | Required | string | Specifies URL for MongoDB database | |
| ORIGIN | Required | string | Origin where requests to server originate from, for CORS purposes | localhost |
| LOG_LEVEL | Optional | string | Debug level | Can be one of debug, info, warn, error |
| DB_TYPE | Deprecated | string | Specify DB to use | MongoDB | FakeDB |
| REFRESH_TOKEN_SECRET | Deprecated | string | Refresh JWT secret | |
| PORT | Deprecated | integer | Specifies port for server | |
| LOGIN_PAGE_URL | Deprecated | string | Login URL to be used in emailing service | |
| REDIS_HOST | Deprecated | string | Host address for Redis database | |
| REDIS_PORT | Deprecated | integer | Port for Redis database | |
| TOKEN_TTL | Optional | string | Time for token to live | In vercel/ms format https://github.com/vercel/ms |
| PAGESPEED_API_KEY | Deprecated | API Key for PageSpeed requests | This API key can be set up in Settings. | |
| SYSTEM_EMAIL_HOST | Deprecated | string | Host to send system emails from | |
| SYSTEM_EMAIL_PORT | Deprecated | number | Port for system email host | |
| SYSTEM_EMAIL_ADDRESS | Deprecated | string | System email address | |
| SYSTEM_EMAIL_PASSWORD | Deprecated | string | System email password |