# Installing Checkmate
Installing Checkmate is a fairly straightforward process on a Linux machine. There are many installation options though, which may be overwhelming. Here is a breakdown of all the options:
1. If you'd like to deploy on a Linux server, we suggest you go with **Combined FE/BE Docker option.** This keeps backend and frontend on one Docker and MongoDB on the other Docker service.
2. If you want to deploy on a Linux server, but want to keep frontend and backend on two separate Docker images, then go with **Separate FE/BE option**. Note that this installation method may not be as straightforward as the first oe.
3. (For developers), there is also a 3rd option for developers who want to work on the application, e.g extend and test it.
## Option 1: Combined FE/BE Docker installation (easy method)
In this installation, the React front-end is served from the API server. There is no Client image as it is not required. Note that this is still a React SPA and is served to your browser where it runs.
Requests to the API server are made from your browser. If that is on a different machine than your API server, then you must configure the API URL appropriately (see below).
To get started on your local machine:
* Download the [Docker compose file](https://raw.githubusercontent.com/bluewave-labs/Checkmate/develop/docker/dist-mono/docker-compose.yaml).
* Run `docker compose up` to start the application.
Your application will spin up at `http://localhost:52345`
If you are deploying Checkmate on a remote machine, check the note below, as you need to modify 3 variables:
{% hint style="warning" %}
If you’d like to host your Checkmate instance somewhere other than the machine your browser is running on, you will need to update these variables. As an example, if you were hosting at `143.110.231.94`, use the following:
Where,
* UPTIME\_APP\_API\_BASE\_URL points the frontend to the backend
* UPTIME\_APP\_CLIENT\_HOST is used for building some links that point to the frontend
* CLIENT\_HOST is the origin that the API server will approve requests from
{% endhint %}
If you are upgrading from a previous deployment:
* As long as you mount the same directories to the MongoDB image you'll retain your data.
* The Mongo part of the application remains unchanged.
* You can always back up your data directory as well before migration.
## Option 2: Separate FE/BE Docker installation
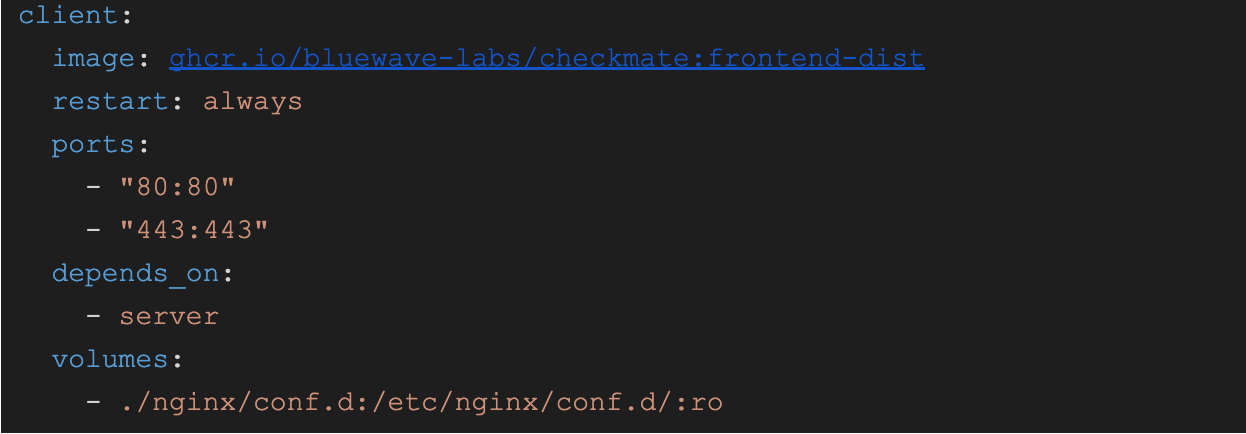
In this installation, the React front-end is served by an Nginx Docker image (named Frontend) and is independent of the API server.
Note that if you want to configure Nginx, you will have to mount a volume to the Frontend image to override the default config:
### 2.1 Running on a local machine
1. Download our [Docker compose file](https://raw.githubusercontent.com/bluewave-labs/Checkmate/refs/heads/master/docker/dist/docker-compose.yaml)
2. Run `docker compose up` to start the application
3. Now the application is running at `http://localhost`
**Optional config:**
* If you want to monitor Docker containers, uncomment this line in `docker-compose.yaml`:
```
# volumes:
# - /var/run/docker.sock:/var/run/docker.sock:ro
```
This gives the app access to your docker daemon via unix socket, please be aware of what you are doing.
### 2.2 Running on a remote server
1. Download our [Docker compose file](https://raw.githubusercontent.com/bluewave-labs/Checkmate/refs/heads/master/docker/dist/docker-compose.yaml)
2. Edit the `UPTIME_APP_API_BASE_URL` variable in the docker-compose file to point to your remote server.
3. Run `docker compose up` to start the application
4. Now the application is running at `http://`
**Optional config:**
* If you want to monitor Docker containers, uncomment this line in `docker-compose.yaml`:
```
# volumes:
# - /var/run/docker.sock:/var/run/docker.sock:ro
```
This gives the app access to your Docker daemon via unix socket, please be aware of what you are doing.
***
## Deploying on Windows
This is like option 2, but for Windows machines.
### Step 1: Fork and clone the repository
1. **Fork the repository:** Go to the Checkmate GitHub repository and fork it to your account.
2. **Clone the repository:** Open your terminal or command prompt and run:
```
git clone https://github.com/your-username/checkmate.git
cd checkmate
```
### Step 2: Set up the backend (server)
1. **Navigate to the server directory:**
2. `cd server`
3. **Install dependencies:**
4. `npm install`
5. **Create a `.env` File:** Add a `.env` file in the `server` directory to hold your server secrets.
### Step 3: Build and Run MongoDB Docker Image
1. **Navigate to the main directory:**
2. `cd ..`
3. **Build the Docker Image:**
```
docker build -f ./docker/dev/mongoDB.Dockerfile -t uptime_database_mongo .
```
4. **Navigate to the docker/dev directory:**
5. `cd docker/dev`
6. **Run Docker container:**
```
docker run -d -p 27017:27017 -v "$(pwd)/mongo/data:/data/db" --name uptime_database_mongo uptime_mongo
```
### Step 4: Start the backend server
1. **Navigate to the server directory:**
2. `cd into server.`
3. **Run the development server:**
4. `npm run dev`
5. Your backend should now be up and running.
### Step 5: Set up the frontend (client)
1. **Navigate to the client directory:**
2. `cd client`
3. **Install dependencies:**
4. `npm install`
5. **Create a `.env` File:** Add a `.env` file in the `client` directory to hold your client secrets.
6. **Run the client (a.k.a frontend):**
7. `npm run dev`
8. Your frontend should now be up and running.
***
## Deploying on ARM machines
If you would like to install Checkmate on Raspberry PI 4, Raspberry PI 5 or MacOS, [use this link](https://github.com/bluewave-labs/Checkmate/blob/develop/docker%2Fdist-arm%2Fdocker-compose.yaml) to download the Docker compose file. Then run the usual `docker compose up` command to start instances.
Your application will spin up at `http://localhost:52345`
Configuration environment variables are the same as what you'd use in Option 1 section above.
## Developer installation (Linux and MacOS)
When you’re working on the app locally, it’s painful to rebuild and reload Docker images every time you tweak the client or server. Instead, run those services directly on your host machine—this gives you instant feedback and lets you use hot-reload without waiting for image builds.
At the same time, we still include MongoDB as a Docker container. This service rarely changes, so keeping it in container simplifies setup and avoids cluttering your host environment.
{% hint style="warning" %}
Make sure you change the directory to the specified directories, as paths in commands are relative.
{% endhint %}
### Cloning and initial setup
This application consists of a frontend (client) and a backend (server) in a single repository. Start by cloning the [repo](https://github.com/bluewave-labs/checkmate), as it contains everything you need, except the [Capture agent](https://github.com/bluewave-labs/capture) if you plan to use the Infrastructure Monitoring feature.
### Setting up Docker images
This application requires a MongoDB instance. If you want, you can use our Docker images. Otherwise, you can provide your instances as well.
1. From your `checkmate` directory you created above, cd into `server/dev`.
2. Run `build_images.sh`
3. Run `docker run -d -p 27017:27017 -v $(pwd)/mongo/data:/data/db --name uptime_database_mongo uptime_database_mongo`
### Server set up
The server requires some configuration to run.
1. From your `checkmate` directory, CD into the `server` directory.
2. Run `npm install`.
3. In the `server` directory, create a `.env` file to hold your configuration. This is where you'll add your environment variables.
4. Add the [required environmental variables](https://docs.checkmate.so/users-guide/quickstart#env-vars-server).
5. Start the `server` by running `npm run dev`.
### Client set up
The client also requires some configuration in order to run.
1. From your `checkmate` directory, CD into the `client` directory.
2. Run `npm install`.
3. In the `client` directory, create a `.env` file to hold your configuration. This is where you'll add your environment variables.
4. Add the [required environmental variables](https://docs.checkmate.so/users-guide/quickstart#env-vars-client).
5. Start the `client` by running `npm run dev`
### Access the application
1. The `client` is running at `localhost:5173` (unless you changed the default port).
2. The `server` is running at `localhost:52345` (unless you changed the default port).
***
### Client env vars
1. Change directory to the `Client` directory
2. Install all dependencies by running `npm install`
3. Add a `.env` file to the `Client` directory with the following options:
| ENV Variable Name | Required/Optional | Type | Description | Accepted Values |
| ------------------------- | ----------------- | --------- | ------------------ | ---------------------------------- |
| VITE\_APP\_API\_BASE\_URL | Required | `string` | Base URL of server | {host}/api/v1 |
| VITE\_APP\_LOG\_LEVEL | Optional | `string` | Log level | `"none"`\|`"error"` \| `"warn"` \| |
| VITE\_APP\_DEMO | Optional | `boolean` | Demo server or not | `true`\|`false` \| |
Sample ENV file:
```
VITE_APP_API_BASE_URL="http://localhost:52345/api/v1"
VITE_APP_LOG_LEVEL="debug"
```
### Server env vars
1. Change the directory to the `Server` directory
2. Install all dependencies by running `npm install`
3. Add a `.env` file to the `Server` directory with the following options:
#### Environment variables
Configure the server with the following environmental variables. **Note that those variables need to be set in `.env` files if you are running the local development server, or in the Docker compose file if you use docker compose.**
ENV Variable Name
Required/Optional
Type
Description
Accepted Values
CLIENT_HOST
Required
string
Frontend host
JWT_SECRET
Required
string
JWT secret
DB_CONNECTION_STRING
Required
string
Specifies URL for MongoDB database
ORIGIN
Required
string
Origin where requests to server originate from, for CORS purposes
localhost
LOG_LEVEL
Optional
string
Debug level
Can be one of debug, info, warn, error
TOKEN_TTL
Optional
string
Time for token to live
In vercel/ms format https://github.com/vercel/ms
Sample, minimum env file is as follows:
```
CLIENT_HOST="http://localhost:5173"
JWT_SECRET="my_secret"
DB_CONNECTION_STRING="mongodb://localhost:27017/uptime_db"
TOKEN_TTL="99d"
ORIGIN="localhost"
```
{% hint style="warning" %}
Note that for the Pagespeed feature to work, you need a [free Google Pagespeed API key from this link.](https://developers.google.com/speed/docs/insights/v5/get-started)
{% endhint %}
***
## API documentation
Our API documentation follows the [OpenAPI spec](https://www.openapis.org/). You can see the documentation on your local development server at [http://localhost:{port}/api-docs](https://docs.checkmate.so/users-guide/http:/localhost:{port}/api-docs) . You can also view the documentation on our demo server [here](https://checkmate-demo.bluewavelabs.ca/api-docs). Just a note that the API documentation is still in the works. Let us know in our Discord channel if you have any questions about the latest status.
***
## Error handling
Errors are returned in a standard format:
`{"success": false, "msg": "No token provided"}`
Errors are handled by error handling middleware and should be thrown with the following parameters
| Name | Type | Default | Notes |
| ------- | --------- | ---------------------- | ------------------------------------ |
| status | `integer` | 500 | Standard HTTP codes |
| message | `string` | "Something went wrong" | An error message |
| service | `string` | "Unknown Service" | Name of service that threw the error |
Example:
```
const myRoute = async(req, res, next) => {
try{
const result = myRiskyOperationHere();
}
catch(error){
error.status = 404
error.message = "Resource not found"
error.service = service name
next(error)
return;
}
}
```
Errors should not be handled at the controller level and should be left to the middleware to handle.